Basics of ROS
Hi folks...!!! Hope you are all clear with the theory part and the math behind robotics that we discussed in Basics of Robotics.
Now its time to implement the things that we have learnt in theory till know. Robots are the combinations of hardware and software.
Hardware is nothing but the motors, sensors and chassis of the robot. We will learn about hardware parts in the Projects section. Now lets talk about the SW part.
We will use ROS to build our robots.
This page will give you a brief idea about ROS and make you familiar with the terminologies and basics of ROS.
Contents:
1. What is ROS.
2. Why ROS.
3. Installing ROS.
6. What is ROS Node.
11. What is Launch file.
12. What is URDF.
13. Understanding tf2.
14. Rviz.
Hmmmm....!! Looks like the list of contents is bit lengthy. But trust me, this post will give you a quick start to ROS. I have made things as easier as possible to understand with examples and code.
So What is ROS...? Why ROS to build our robots..? These questions are answered in next few lines.
First, What is ROS..?
ROS stands for “Robot Operating System”, but it is not actually an operating system. ROS is actually a set of software libraries and tools made to ease the development of robotic applications. It provides the services you would expect from an operating system, including hardware abstraction, low-level device control, implementation of commonly-used functionality, message-passing between processes, and package management.
Now, Why ROS..?
ROS is widely used in robotics companies, universities and robotics research institutes for designing, building, and simulating a robot model and interfacing it into real hardware. We almost have packages ready for every kind of Robots (manipulators, mobile robotics, quadrotor, etc). So we need not write every thing from scratch.
Few reasons for Why ROS:
1. ROS is a open source software.
ROS is free and you can use it for commercial purposes.
2. All the Transforms of the robot are tracked in ROS.
We no more need to find the Forward kinematics equations to find the position of the end-effector. We just have to provide the robot description in URDF format. Thats it tf or tf2 module keeps track of all the transforms of the robot from base to end-effector.
3. There are IK slovers to solve your Ik problems.
Inverse kinematics problem is no more a trouble. There are many plugins that solves the Ik problem for simple to complex robotic manipulators. So your time to find the closed form equations for Ik or finding Jacabian inverse is saved. Few Ik solvers are IKfast(Analytical Solver) and kdl (Numerical Solver)
4. Struck with path planning and obstacle avoidance don't worry Moveit will take care.
MoveIt! is a set of packages and tools for doing motion planning, manipulation, 3D perception, kinematics, collision checking, control, and navigation in ROS.
5. Want to work with differential drive robots. Then use ROS navigation stack.
The Navigation stack contains readyto-use navigation algorithms which can be used in mobile robots, especially fordifferential wheeled robots.Using ROS navigation we can make the robot move autonomously in given environment.
6. ROS provides an easy way to control the actuators of the robots using ROS control package.
ROS control provides built-in PID control loop with joint limits to make the motion of the robot swift and smooth.
7. Open CV Interfaced to ROS.
We can use OpenCv libraries with ROS for Vision and perception tasks.
8. ROS has useful tools to visualize your robot. They are Rviz and Gazebo
We can make a exact replica of your robot in Gazebo with all physical properties(like weight, inertia, collisions, etc) and test your code in simulation first before testing it on real hardware. Rviz is a debugging tool which vizualizes what your real/simulated robot is experiencing (like joint motion, vision, etc).
9. ROS is light.
ROS can run on embedded boards like Rasberry pi.
10. Struck with problem/issue in ROS. Then post your trouble @ answers.ros.org.
ROS has a active community to answer your questions on ROS. Go sing up today and become a contributor.
Hope these reasons are enough to clear your doubt on Why ROS.
Now lets start working with ROS.
Before going further, I would like to express my gratitude to the publishers of ROS, who made documentation for each and every thing about ROS (beginning from installing ROS in your PC to understating the functionality of PR2 robot) in a easy to understand manner. Thanks to them.
On the first step, to work with ROS we need to have it installed in our PC. So lets see the prerequisites and steps too Install ROS.
Installing ROS:
ROS works with Linux operating system, so you need to have a PC with Linux operating system. You can use virtual machines (like Vmware) to run Linux operating system in you Windows PC.
Once you have Linux running in your PC, you are now ready to install ROS. ROS is released in different versions. I am using ROS kinetic in my projects.
Click here to select the version you want to install and follow the instruction to complete ROS installation in your PC.
Once done with the installation, create a ROS workspace.
Creating ROS workspace:
ROS uses catkin to build the ROS projects. So first we need to create a catkin workspace. Follow the below steps to create your catkin workspace.
First open a terminal. Then navigate to the folder where you want to create the workspace. Then enter the below commands to create your work space.
$ mkdir -p catkin_ws/src
$ cd catkin_ws/
$ catkin_make
$ source devel/setup.bash
Hope you have successfully created the catkin workspace.
If you see inside the /catkin_ws you will find three sub folders. They are source space (/src), build space (/build) and development space (/devel).
We are going to work in the source space(/src) where we create packages for our robotic projects which contains the source code files. These packages are known as catkin packages. Once the code is ready we have to build package without errors and make it executable.
Open a terminal, navigate to /catkin_ws/src and enter the below commands to create the catkin package.
$ cd ~/your_folder/catkin_ws/src
$ catkin_create_pkg beginner_tutorials std_msgs rospy roscpp
This will create a "beginner_tutorials" folder which contains a package.xml and a CMakeLists.txt. The arguments "std_msgs", "rospy" and "roscpp" are the list of dependencies on which our "beginner_tutorials" package depends. You will know more about dependencies later, for now don't worry about them.
catkin_create_pkg requires that you give it a <package_name> and optionally a list of dependencies on which that package depends.
The format of this command is given below.
$ catkin_create_pkg <package_name> [depend1] [depend2] [depend3]
We know how to create ROS workspace and catkin packages for our projects.
Now lets say we have written some code and want to execute it. For that we have to first build our packages.
Building ROS Packages:
To build your packages, you have to navigate to /catkin_ws folder in the terminal and enter the below command.
$ cd ~/your_folder/catkin_ws
$ catkin_make
Every time after building the packages, we must give the below command. This will update our changes in the ROS environment.
$ source devel/setup.bash
The above commands will build all the packages in your workspace. If you want to build only selected packages then use below command.
$ cd ~/your_folder/catkin_ws/src
$ catkin_make --pkg <my_package_name1> <my_package_name2>
$ source devel/setup.bash
That all about setting up the ROS workspace. Now lets move on to the next topic.
From now on we will learn how to write code for robots in ROS. ROS packages can be written in C++ or Python.
What is ROS Node:
A ROS node is nothing but an executable program which contains a part of code of the robot. A robotic application can have more than one node, for example we can have a node to compute inverse kinematics, a node to send commands to the actuators, a node to get the joint angle values from sensors and etc.
All these nodes communicates with each other through messages. There is a Master node running which will have all the address of the nodes running in the system. It is Master node's responsibility to connect the Nodes with each other to start communication.
There are three mode in which the nodes can communicate. They are topics, services and Actions. We will see about them later.
But for now we will see how to write a code for a simple node. A node can be either written in C++ or Python.
Coding a ROS node:
Writing a node in python is easier than C++.
So lets see python first and then we will see C++
Python:
First navigate to the beginner_tutorials folder that we created and inside it create a new folder named scripts.
$ cd ~/your_folder/catkin_ws/src/beginner_tutorials
$ mkdir scripts
Inside the scripts folder paste the simple_node.py file. In this file we will simply initialise a node with name "simple_node_py" and run a loop until the node is killed.
To make a node (written in python) executable, run the below command once before running the node for the first time.
$ cd ~/your_folder/catkin_ws/src/beginner_tutorials/scripts
$ chmod +x simple_node.py
After making the file executable, run "source setup.bash" to update the file in ros environment.
$ cd ~/your_folder/catkin_ws
$ source devel/setup.bash
Before running any ROS node, we must first run the ROS Master node. Without ROS master node, your nodes cannot start. So keep in mind to run ROS master in a separate terminal before running any node. Open a new terminal and enter below command to run the Master node.
$ roscore
Now we are all set to run our simple_node.py. Enter below command to run the "simple_node_py" node.
$ rosrun beginner_tutorials simple_node.py
If everything goes right, then your terminals will look like below
/roscore Terminal

/simple_node_py Terminal

Press Ctrl+C in the same terminal to stop the running node.
The format to run the python node:
$ rosrun <package_name> <python_file_name>
Now you can edit the simple_node.py and run the node directly. No need to build the package every time you edit the python file.
But this is not the case in C++. Lets have a loo how to run a node written in C++.
C++:
Navigate to /src folder
$ cd ~/your_folder/catkin_ws/src/beginner_tutorials/src
Paste the simple_node.cpp file here. In this file also we will initialise a node with name "simple_node_cpp" and run a loop until the node is killed by clicking Ctrl+C.
To make a node written in cpp executable, you need to add lines in CMakeLists.txt as shown below.
add_executable(simple_node src/simple_node.cpp)
target_link_libraries(simple_node ${catkin_LIBRARIES})
After adding these lines in the CMakeLists.txt, build the package.
$ cd ~/your_folder/catkin_ws
$ catkin_make
$ source devel/setup.bash
Make sure Master node is running in a terminal. If not, open a terminal and enter "roscore" command to start ROS Master node.
Now we are set to run the "simple_node" node. Enter the below command to run the node
$ rosrun beginner_tutorials simple_node
If everything goes right, then your /simple_node terminal will look like below

The format to run the CPP node:
$ rosrun <package_name> <node_name>
If you edit code in simple_node.cpp, you must build the package to reflect the changes in the node execution.
So make sure you build the package every time you modify something in the .cpp files.
This is all about the nodes.
At this point, we know what is a node, how to write a simple node in python & C++ and how to run a node.
Some commands related to nodes are given below
a) To list the active nodes:
$ rosnode list
b) To get information about a specific node.
$ rosnode info /<node_name>
c) To kill the running node.
$ rosnode kill /<node_name>
Now lets learn how these nodes communicate with each other. For any communication system there will be some messages exchange between two parties.
Same is applied to ROS nodes. Nodes in ROS uses ROS Messages to communicate.
What is ROS Message:
ROS message provides the data structure for Topics, Service and Actions to transfer information between nodes.
For topics, ROS messages are present in .msg files. These message have only one part. The message format for topic messages are as below
fieldtype1 fieldname1
fieldtype2 fieldname2
fieldtype3 filedname3
For services, ROS messages are present in .srv files. These message will have two parts. Request part followed by a Response part. The two parts are separated by "---" symbol. The message format for service messages are as below
#Request
fieldtype1 fieldname1
fieldtype2 fieldname2
---
#Respose
fieldtype3 fieldname3
fieldtype4 fieldname4
For Actions, ROS messages are present in .action files. These message will have three parts. Goal part followed by a Result part followed by Feedback part. Each part is separated by "---" symbol. The message format for action messages are as below
#Goal
fieldtype1 fieldname1
---
#Result
fieldtype3 fieldname3
---
#Feedback
fieldtype5 fieldname5
There are many predefined messages present in ROS which you can use for your project. If you feel none of the already available messages fulfil your task then you can also create your own message files. We will cover this in c
Some commands related to message are given below
a) To list all messages used for topics and actions:
$ rosmsg list
b) To list all messages used for services.
$ rossrv list
c) To list the packages that contains message files
$ rosmsg packages
(OR)
$ rossrv packages
d) To show message format
$ rosmsg show package_name/message_name
(OR)
$ rossrv show package_name/message_name
Lets check format of some predefined messages for topics, services and actions . To do so follow the below steps.
Open a terminal and enter the below commands. Check the response of each command to see the format of the messages.
For Topic Message:
$ rosmsg show std_msgs/Int32
For Service Message:
$ rossrv show rospy_tutorials/AddTwoInts
For Action Message:
$ roscd actionlib/action/ ; cat Test.action
Hope the output of the above three commands gave you much clearer view on the format of ROS message.
Now lets move on to learn how the nodes communicate using these messages through topics, services and actions.
As we have seen earlier a node can be written in either C++ or Python. The best part is that ROS is language agnostic i.e., a python node can communicate with a C++ node without any problem.
Understanding ROS Topic:
Topics are named buses over which nodes exchange messages. This is the most commonly used mode of communication for nodes in ROS.
In this mode, a node broadcast a message with a topic name. This broadcasting node is known as publisher node.
A node that want to receive the message will subscribe to this topic name. This node is known as subscriber node.
This mode of communication is unidirectional. The nodes are unaware of who they are communicating with i.e., A publisher will keep on publishing the data even if there is no/multiple subscriber. Similarly subscriber will keep listening to the topic if there is no/ multiple publishers. It is responsibility of the ROS master to establish the connection between the publisher and subscriber when they are on the same topic.
To make things much clearer I will use the FM radio System as analogy.
The transmitter (publisher) at radio station (node) will transmit your favourite channel (message) at some fixed frequency (topic). Suppose you are sitting in your car, wishing to listen to your favourite channel(message). You will tune the radio receiver (subscriber) to that frequency(topic).
Neither you are aware where exactly the radio station is nor the radio station want to know where you are. But still you can enjoy the music in your favourite channel.
Hope you are clear with how nodes communicate using "Topics" in ROS.
Usage: Topics are most suitable for continuous data streams like sensor data, Robot joint states, etc.
Now lets see how to write a publisher and a subscriber node in python & C++.
Coding Publisher and Subscriber Nodes:
We will write a publisher node that will publish a count value over a topic. This count value increments by 1 for every 0.1 secs from the starting of the node. The subscriber node will subscribe to this topic and will print the count value when it receive the data.
Python:
Navigate to scripts folder and paste py_publisher.py and py_subscriber.py files. The syntax and semantics are explained in the code.
Make these scripts executable and run them in each terminal. Do not forget "roscore".
If every thing goes correct then your terminals should look like below.
/subscriber_py node Terminal

/publisher_py node Terminal

C++:
Navigate to src folder and paste cpp_publisher.cpp and cpp_subscriber.cpp files.
Then add below lines in the CMakeLists.txt and build the package to make cpp_publisher.cpp and cpp_subscriber.cpp executable.
add_executable(publisher_cpp src/cpp_publisher.cpp)
target_link_libraries(publisher_cpp ${catkin_LIBRARIES})
add_executable(subscriber_cpp src/cpp_subscriber.cpp)
target_link_libraries(subscriber_cpp ${catkin_LIBRARIES})
Once the build is successful, run the publisher and subscriber nodes in different terminals. Do not forget "roscore".
The output of the terminal will be as below
/publisher_cpp node Terminal

/subscriber_cpp node Terminal

Some of the useful commands for topics.
a) To list the current topics subscribed/publishing by nodes:
$ rostopic list
b) To get information about a specific topic.
$ rostopic info /topic_name
c) To get the message type of the topic
$ rostopic type /topic_name
d) To print the data of a topic on the terminal window
$ rostopic echo /topic_name
e) To publish data on a topic from the terminal window
$ rostopic pub /topic_name message_type data
Ex: $ rostopic pub /topic_py std_msgs/Int32 "data: 10"
Try to run the above commands while running the publisher and subscriber nodes.
Hope every thing is clear about the ROS topics. Now lets move on to see what is ROS service
Understanding ROS Service:
Not every time this (Topics) one-way communication will work. We may sometimes want a node to perform/execute a task or provide data when asked for.
So we require a mode of communication where there is a response to the request. Technically these are know as RCP (Remote procedure calls). This kind of request-response mode of communication can be achieved by Services in ROS.
A node providing service is known as Service Server node. A node asking for service is known as Service Client node.
A ROS node offers a service under a string name, and a client calls the service by sending the request message and awaiting the reply.
To make things much clearer I will use the Food Home delivery system as analogy.
To order food to your home, you call to restaurant and place your order. After few minutes the delivery boy will reach your home and deliver you tasty food. Here the restaurant is the Service provider (Server) and you are the client. Request message is your order and response is the delivery boy at your door step.
Note that there can be only one Service server node with a unique service name. But the same service can be requested by one/multiple client nodes
Usage: Services should be used for tasks that terminate quickly, e.g. for querying the state of a node or doing a quick calculation such as IK. Mostly used for comparably fast tasks such as requesting specific data.
Now lets see how to write a Service Server node and a Service Client node in python & C++.
Coding Service node and Client node:
We will write a service node that takes two numbers as request from client and send their sum as response to client.
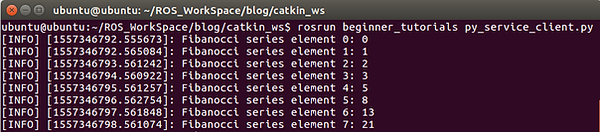
Our client node will print the first 80 elements of the Fibonacci series. Client node will use service to add the numbers and print the elements of the Fibonacci series.
Python:
Navigate to scripts folder and paste py_service_server.py and py_service_client.py files. The syntax and semantics are explained in the code
Make these scripts executable and run them in each terminal.
If every thing goes correct then your terminals should look like below.
/service_server_node_py Terminal

/service_client_node_py Terminal
C++:
Navigate to src folder and paste cpp_service_server.cpp and cpp_service_client.cpp files.
Then add below lines in the CMakeLists.txt and build the package to make cpp_service_server.cpp and cpp_service_client.cpp executable.
add_executable(service_server_node_cpp src/cpp_service_server.cpp)
target_link_libraries(service_server_node_cpp ${catkin_LIBRARIES})
add_executable(service_client_node_cpp src/cpp_service_client.cpp)
target_link_libraries(service_client_node_cpp ${catkin_LIBRARIES})
Once the build is successful, run the service node and client nodes in different terminals. Do not forget "roscore".
The output of the terminal will be as below
/service_server_node_cpp Terminal

/service_client_node_cpp Terminal

Some of the useful commands for Service.
a) To list the current topics subscribed/publishing by nodes.
$ rosservice list
b) To get information about a specific service.
$ rosservice info /service_name
c) To get the name of the node that provides a particular service.
$ rosservice node /service_name
d) To get the message type of the service.
$ rosservice type /service_name
e) To call a service from terminal window.
$ rosservice call /service_name service-args
Ex: $ rosservice call /add_py "a: 10
b: 20"
Try to run the above commands while running the service node.
Hope every thing is clear about the ROS service. Now lets move on to see what is ROS action.
Understanding ROS Action:
We have seen Services executing tasks for the requested client. But there is a drawback with services, when service is requested by the client, the request is assigned in the global callbacks queue. If this service for any reason takes long time to complete the task, it may have side effect on the other nodes.
Therefore, services should never be used for longer running processes, in particular processes that might be required to preempt if exceptional situations occur. In some cases, however, if the service takes a long time to execute, the user might want the ability to cancel the request during execution or get periodic feedback about how the request is progressing.
The actionlib package provides tools to create servers that execute long-running goals and that can be preempted if required. It also provides a client interface in order to send requests to the server.
To make it simple I will use the analogy of a Food delivery mobile app with tracking this time.
Lets say you have ordered food online from a restaurant through a mobile App which provides the current location of the delivery boy and also an option to cancel the order. Now you can track the position of the deliver boy and estimate the time to reach your home. For some reason, lets say traffic, the delivery boy is struck at one place for long time. Then you can cancel the order because you have already lost interest to eat that due to long wait.
Here mobile app is the Action Server, you are the Action Client, delivery boy at your door step is the Goal and the current location of the delivery boy is the Feedback. And option to cancel order is the Preemption of goal.
Usage: Actions are used for longer tasks like execution of robot motions or perception. Semantically for real-world actions.
Now lets see how to write an Action server and an Action Client node in python & C++.
Coding Action Server and Action Client Nodes:
Lets write a action server node which can compute factorial of a given number. The server node will take 1 sec to compute multiplication operation of two numbers. Hence to compute factorial of 10, our node will take approx. 10 secs.
Now lets write an Action client node which will ask (goal) the server node to compute factorial of a given number. The client node must get the response from the server node within 10 secs approx., else the goal will be preempted. In the client node, I have given two goals to the server (8! and 14!). Run Action sever and Action client nodes to know the results.
Before jumping into code we have to first add the actionlib packed in the dependencies list.
Adding dependencies to package:
Do you remember the list of dependencies we gave while creating our beginner_tutorials package ?
We have given rospy, roscpp and std_msgs as dependencies. You can find this list in CMakelists.txt. Here the list of packages should be given on which our package (beginner_tutorials) is dependent.
To run ROS Actions in beginner_tutorials package, we should add actionlib and actionlib_msgs packages to this list. So add actionlib and actionlib_msgs in CMakelists.txt as here.
find_package(catkin REQUIRED COMPONENTS
roscpp
rospy
std_msgs
actionlib
actionlib_msgs
)
Along with this, you also have to add below lines in package.xml file for dependencies as here.
<build_depend>actionlib</build_depend>
<build_depend>actionlib_msgs</build_depend>
...
<build_export_depend>actionlib</build_export_depend>
<build_export_depend>actionlib_msgs</build_export_depend>
...
<exec_depend>actionlib</exec_depend>
<exec_depend>actionlib_msgs</exec_depend>
After adding dependencies build the package and then start coding.
Python:
Navigate to scripts folder and paste py_action_server.py and py_action_client.py files. The syntax and semantics are explained in the code
Make these scripts executable and run them in each terminal.
If every thing goes correct then your terminals should look like below.
/action_server_node_py Terminal

/action_client_node_py Terminal

C++:
Navigate to src folder and paste cpp_action_server.cpp and cpp_action_client.cpp files.
Then add below lines in the CMakeLists.txt and build the package to make cpp_publisher.cpp and cpp_subscriber.cpp executable.
add_executable(action_server_node_cpp src/cpp_action_server.cpp)
target_link_libraries(action_server_node_cpp ${catkin_LIBRARIES})
add_executable(action_client_node_cpp src/cpp_action_client.cpp)
target_link_libraries(action_client_node_cpp ${catkin_LIBRARIES})
Once the build is successful, run the Action server and client nodes in different terminals.
The output of the terminals will be as below
/action_server_node_cpp Terminal

/action_client_node_cpp Terminal

Hope every thing is clear about the ROS Actions. Now lets move on to see what is Launch file.
What is Launch file:
Till now we have been running each node in a separate terminal. What if we want to run all the nodes in the beginners_tutorials package at once. Then we may have to open more than ten terminals. That will be a mess, isn't it.
In such cases launch file will come in handy. Launch file is an xml file format which can be used to run multiple nodes, load variables into ROS parameter server, etc. You can even include another launch file in your launch file. If you use roslaunch, it will automatically start roscore if it detects that it is not already running, you don't have to run roscore explicitly. It is a good practice to run your nodes using launch files.
So lets see how to write a launch file.
The description of the launch file must be within the <launch> tags.
<launch>
.....
.....
</launch>
The node that we want to run must be with the the <node>. The format to run the node using launch is given below
<launch>
<node name="name_of_node" pkg="package_of_node" type="cpp or py" output ="screen"/>
</launch>
The "type" argument is used to differentiate a py node and cpp node. If the node is a cpp node, the type argument will be the name of the node. If the node is a python node then the type argument will be the name of the python file.
output="screen" will make the debug statements display on the terminal window. Without this argument your debugs will not be displayed on the terminal window.
Now lets create a launch file in beginners_tutorial package. We will run the Subscriber, Service and Action Server nodes of python and cpp files.
Navigate to beginners_tutorial package and create a new folder with name "launch".
$ cd ~/your_folder/catkin_ws/src/beginner_tutorials
$ mkdir launch
Inside this launch folder paste my_launch.launch file and run the below command to launch my_launch.launch.
$ roslaunch beginner_tutorials my_launch.launch
Your terminal window will look as below,

That' it, all six nodes are running in the same terminal. Lets check if all six nodes are active using rosnode command line.
Keep the launch terminal alive and enter below command in the new terminal to list the active nodes.
$ rosnode list
The output of the above command should be similar like below,

This is how we can use launch files to run multiple nodes in a single terminal. Go through roslaunch tutorials in ROS wiki for more info.
Now lets move on to know what is URDF.
What is URDF:
Urdf stands for Universal Robotic Description Format. URDF is an XML file format used in ROS to describe all elements of a robot and their properties. URDF will have the information about the robot's physical construction, geometry, dynamics, etc. In short URDF will tell ROS how the links and joints are connected, type of joints, the dimensions of links, mass and inertia of the links, etc.
So to start building your robots in ROS first you need to know how represent your robot in URDF file.
Go through "Building Visual Robot Model" and "Building Movable Robot model" in URDF Tutorials of ROS wiki to understand how to write URDF of the robot. These are good enough for now to build our custom robots. Later you can learn more about URDF like how to use Xacros in URDF, adding dynamics to the robot and etc.
Once you are done with the basics of URDF, move to the next topic TF module.
Understanding tf2:
Almost everything in robotics is concerned with where things are - either relative to the robot itself or relative to other things. Whenever a robot wants to interact with the real world, it will need to know where the things it wants to interact with are.
In the basics of robotics we have learned about Rigid body Transformations and Forward kinematics of the robot. Lets recap them in short.
Quick Recap on Transformations:
Each link of robot is assigned with a coordinate frame from the base to the end-effector. Not only the links of robot but also the objects (like camera fixed to the wall, the ball which robot have to pick, goal pose of the end-effector, etc) around the robot are also assigned with coordinate frames. These frames will tell us the position and orientation of the frame w.r.t to other frames.
The coordinates of these frames are determined using the Transformation matrices.
These frame coordinates need to be updated whenever either the robot moves, or other things move. Computing transformation matrices for all the frames, keeping track of all of those coordinates and updating them becomes a really involved task if we move beyond a simple robot or robot application.
So this is where tf2 (tf stands for 'transform') comes in. The tf2 package enables ROS nodes to keep track of coordinate frames and transform data between coordinate frames.
A node that knows a transform between frames will publishes it to a tf ROS topic and nodes that are interested use tf to subscribe to the transforms. tf can then efficiently compose the net transform between requested frames.
Tf package relieve us free from deriving the transformation matrices and forward kinematics equations of our robot.
How to use tf:
Our part is to write the URDF file of our robot and and a node to publishing the joint sensors data continuously on "/joint_states" topic.
Thats it..!! Load this URDF file in parameter server, run node publishing joint positions data and run the robot_state_publisher node.
The robot_state_publisher will receive the joint positions data from "/joint_states" topic, compute the transformations of all the frames and publish those transforms on "/tf" and "/tf_static" topics.
This gives you a basic understanding of what is the tf2 package. You can get the working examples in the Projects section.
Go through the tf2 tutorials in ROS wiki to get more information.
Rviz:
Rviz (ROS visualizer) is powerful 3D visualisation tool that allows you to view the robot's sensors and internal state.
Rviz uses the URDF file to load our robot in the tool. It can also display live representations of sensor values coming over ROS Topics including camera data, point cloud data, infrared distance measurements, sonar data, and more.
Using Rviz we can check our path planning or collision checking algorithms by inserting objects, trace the motion of any link of the robot, use interactive markers to move the robot and do lot things.
We will be using the functionalities of Rviz in the Projects section.
For now paste the urdf_tf_rviz.launch file in launch folder and run using below command.
$ roslaunch beginner_tutorials urdf_tf_rviz.launch
This will open the rviz tool with "06-flexible.urdf" loaded and a controller gui. You should see the robot displayed in rviz like below,
Rviz
Controller gui


That's all about the basics of ROS. With this knowledge you are ready to understand the 3-DOF manipulator project. See you there.
Post your queries in the comment section.
Thank you...!!!